Adding a tongue and groove ceiling to your room not only adds beautiful texture and interest to the living room or dining room but also blends the range of blended vanilla. Follow this article for installing the tongue and groove roof in your home.
Tongue and groove ceiling boards are a popular choice for porch ceilings because of their ease of installation, stability, and looks. The lines of the roof break up the surface and give it a classic, slightly rustic appearance. In terms of building, the concept is the same as a tongue, and groove flooring, except the boards, are much lighter and tend to be more comprehensive. Start with the bare ceiling planks, parallel horizontal support beams across the entire ceiling span. Let’s know about the whole process of the tongue and groove ceiling.
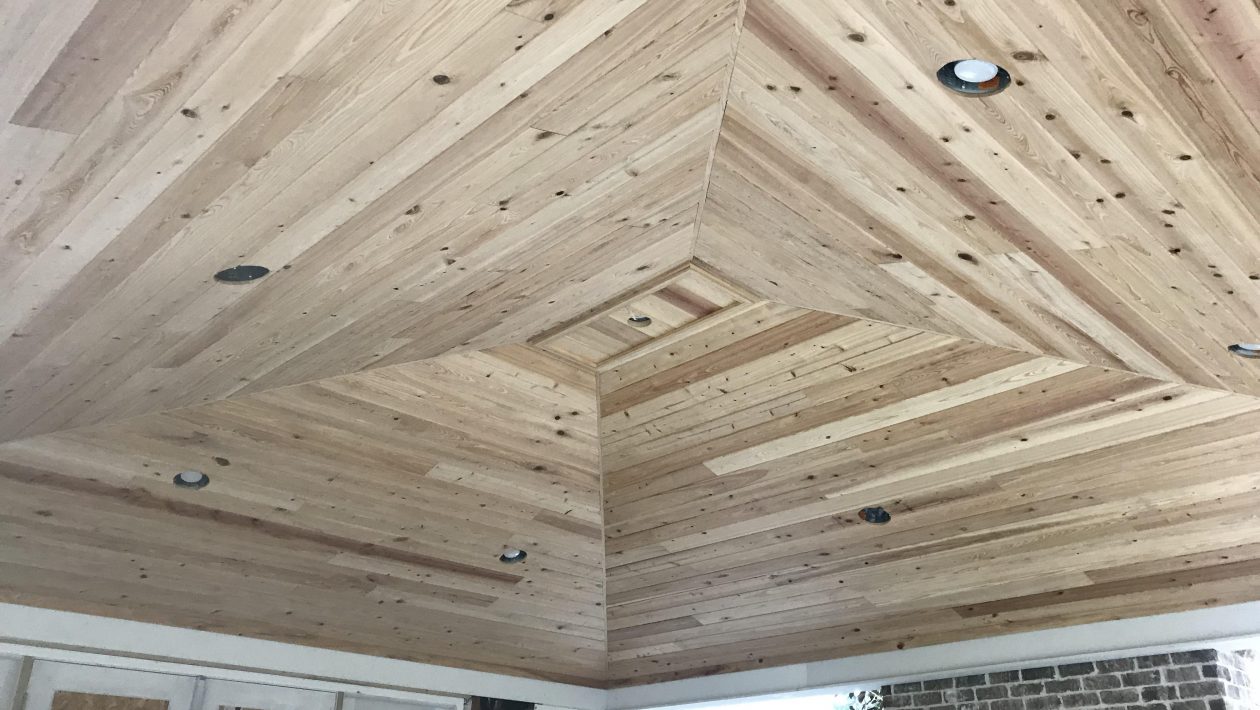
Tongue and Groove Ceiling
Step 1: The selling area needs to be measured in quantity to be purchased.
Measure the width and length of the roof if you want to roof leak repair so that you get the appropriate size board for the tongue and groove roof. Instead of dividing the width of the ceiling by the width of each panel, protruding language include so that you can estimate the width in your roof planks. You will have to install the first and last roofing planks—25 inches from the walls. Start on an exterior wall as they become a straight wall of a room.
Step 2: Purchase and pay attention to all the roof jumps you plan to use
Clean stains and water-based finishes on roofing boards before you later put them on to save a very messy clean-up job. Add about 10% of the tongue and groove measurements to allow for the reduction and fitting of light fixtures and ceiling fans. Allow the dry and sealed plates to dry for 12 hours before starting the installation.
Step 3: Remove any crown moulding or trim around the roof parameters.
Carefully remove the crown moulding or trim from the roof primer. When you have cleaned the tongue and groove after installing the boards, then you can use it again and again.
Step 4: Remove light fixtures, ceiling and ceiling art.
Careful light fixtures, ceiling fans and a bit of art attach you and remove you as such a mobile. If you have a plant hanger suspended from the roof, take them too—Mark circles around places.
Step 5: Detect sailing gambles.
Use a studio finder to help you find roof milestones. You will attach the connecting strips with 16 inches in the center. They will help in roof expansion and contraction.
Step 6: Arrange the first primary line of furring strips.
Scale and cut the first perimeter line of furnace strips. Attach the shirt line to the ceiling. It extends parallel to the outer wall at right angles to the roof joists. Use a pneumatic nail gun to sharpen the perimeter fringe strip of atoms.
Step 7: Attach the forging strips to the roof lies.
Scale and cut all the strips you will need right away. They should run as much as possible, parallel and the entire length above the pair of roofs. They will be attached to the nail with a nail and frame gun.
Tongue and Groove Ceiling how to install
Before installing your wood panelling: preference, material and preparation. Besides the preparation of your wall, the first question to ask yourself before starting your installation site is the choice of the direction of installation of your panelling. We will detail here the structure of panelling on the wall or in the base.
Three possibilities are available to you for the direction of installation of your panelling on the wall:
Vertical structure: It gives an impression of height to the room, but makes it appear narrower. To be preferred on a single section of wall.
The horizontal installation: It gives an impression of perspective to the room but makes it appear lower. To be preferred in rooms with high ceilings or on walls perpendicular to light sources.
Diagonal installation: very popular with architects, brings a modern and original touch to an interior but will require a lot of cuts during installation.
However, you will have to choose the installation method of your panelling, according to your manufacturer. But also according to your affinities with this type of installation:
Nailed or clipped installation:
this type of building is the most widespread because it adapts to any support, even with some irregularities, caught up by the batten framework. This type of installation also makes it possible to add sound or thermal insulation behind your wood panelling, rock wool type, and to pass your cables if necessary. The clip-on installation allows you to change a board if required and is easy to install.
Glued installation: this installation was the most popular there is still some time but does not allow adequate ventilation of your wood panelling, which needs to breathe. We do not recommend this type of installation for wood panelling.
Equipment
- Wood panelling slats
- Planed battens (allow a thickness of about 25 to 30 mm)
- Fixing clips, wall stapler and staples, or man’s head nails depending on your chosen fixing method
- Man’s head nails and nail set
- Pegs to hit
- Plywood shims
- Glue
- Recessed boxes for drywall
- Cornices, finishing strips, plinths according to your needs
- Meter, cutter, spirit level, mason’s ruler, set square
- Jigsaw and hole saw, workbench
How to do:
The qualities of wood panelling have evolved with the needs of individuals: you can now find boards of different widths, already varnished or painted. There are even self-clipping wood panelling boards, the installation of which requires no nails or staples.
To keep your wood panelling at the same humidity level as your destination room, store your boards on cleats at least 48 hours before installation.
Choose your baseboards and finishing strips at the same time as your panelling to match the wood colours. Remember to count the cutouts for circumventing obstacles (doors, switches, lights, etc.) to estimate your necessary footage.
- The preparation Disassembly of the sockets: cut off the power supply, dismantle all your sockets and secure the bare wires with dominoes. Note the position of the cables if necessary so that you can replace them quickly.
- The switches: remove all the buttons of room, note the location of the wires and secure the cables with dominoes.
Installation of wood panelling: step by step for Tongue and Groove
At your tools: the installation of the batten framework is the step which will require you to be meticulous and patient. The very building of the wood panelling boards is relatively easy for any experienced handyman. Before you start, choose the type of pose that will determine your cuts:
The installation in the lost section is the most economical and therefore the most widespread: it consists in using the drop from the first row laid to continue the next row and so on. No joints are aligned, and you can also use all offcuts.
The stone cut installation is the aesthetic installation par excellence, but which requires many falls to achieve perfect regularity. This installation can be preferred for vertical structure when the length of the board corresponds to or is less than the ceiling height.
3 Essential steps
- Installation of the batten frame :
Once your direction of the building has been determining. Place your framework on your wall, perpendicular to the direction of installation of your panelling (horizontal framework for the vertical structure, vertical framework for flat building and inclined framework for diagonal installation with a frame on the periphery to support the blade ends).
-
- Start tracing the location of cleats on your wall. The angle or the bottom depending on the direction of installation. Then draw a parallel line with a pencil approximately every 50 cm.
- Cut your cleats to the necessary length: your cleats should not exceed 1.50m in length and on the same line, allow a space of 3 to 4 cm between 2 cleats.
- Pre-drill the holes for the fixing screws, countersink to mark the locations on the wall then place your dowels adapted to your support.
- Fix the cleats at the ends (top and bottom or right and left) then adjust the plumb using a tight string and positioning plywood shims behind the intermediate cleats.
- Secure your cleats with dowels driven apart: start with the first plank (low or angle). Attach additional cleats above doors and windows, as well as under windows.
- Check the general plumb before pushing in your ankles fully. If necessary, add shims behind your cleats.
-
Installation of wood panelling boards:
- If necessary, cut the first plank to the desired length. Leave the tongue accessible for interlocking for nailed installation, or the groove available for fastening by staples or clips.
- Do not forget to respect expansion spaces at the periphery of your installation, from 3 to 4 mm. Nail the first blade to the nails of man’s head pushed back with the nail set. Check its plumb: it is this first plank that will determine the overall final rendering of your wall!
- Use clipping for installation and place your clips along the groove of the blade and on the cleat. Then staple them to the cleat.
- For installation by stapling, check the plumb of your blade before fastening your edge at regular intervals to the cleat.
- Continue in this way, check your boards that appropriately interlocked as well as plumb as you go along.
-
Installation of the last row:
At the end of the wall or under the ceiling and reduce the installation space. If necessary, nail your clips if the stapler does not pass, then, after a precise cut of the last blade with the jigsaw, engage thereby rotation. Do not forget the final expansion space of 3-4 mm. As for the first blade, fix this last blade with nails head of man, pushed back with the nail set.
The Cutouts
Windows and doors: go around obstacles by sawing your blades after cutting a notch and spotting the cuts. Attach this blade like a starter blade, to man’s head tips.
Sockets and switches: this is where the flush-mounting boxes come in. Mark the locations on the blade to be installed then saw with a hole saw.
If you have chosen raw wood finishes to paint, make sure that your varnish or paint is completely dry when installing. These finishing details will sign the quality of the work for a pose like a pro!
At the top level of a tongue and groove ceiling: glue or nail a cornice or a flat edge strip. It will make the tongue and groove ceiling better.
At ground level: at the foot of the wooden panelling slats, sealant or clasp a plinth or a floor profile. Finally, at the level of the angles for the outgoing angles and quarter-round for the internal angles, to be pinned with points man’s heads.
A door and window level: frame your openings with nailed profiles.
Reinstall outlets, switches and light fixtures: your wood panelling wall is complete and spotless!
FAQ for tongue and groove ceiling
- What is the cost of shiplap ceiling?
If you choose real boards the shiplap wood cost probably $2.50 to $7.00 for per squat feet. For interior installation, it will cost $500 to $1500 per room. And the outer side of your home it will cost $2800 to $7500.
- How to install tongue and groove pine ceiling?
At the beginning place the first piece in the groove of the front of the wall, facing the tongue. Borrow the framing gun to secure the place by attaching the nail to the plank tongue. For the next part, attach the groove of the fresh chunk to the tongue of the main chunk.
-
What is the three structure of wood panelling?
Vertical structure: It gives an impression of height to the room, but makes it appear narrower. To be preferred on a single section of wall.
The horizontal installation: It gives an impression of perspective to the room but makes it appear lower. To be preferred in rooms with high ceilings or on walls perpendicular to light sources.
Diagonal installation: very popular with architects, brings a modern and original touch to an interior but will require a lot of cuts during installation.
- Which wood is the best for the ceiling?
As we know pine wood is very popular for the ceiling but you can also try cherry and cypress wood.